vet integrates with GitLab Dependency Scanning to detect malicious and vulnerable dependencies on every push and merge request.
Prerequisites
GitLab Account
Active GitLab account with access to your project
Ultimate Plan
GitLab Group with Ultimate Plan for security scanning features
Security scanning features are only available to GitLab Ultimate plans. Free users can still use the Vet CI component to find vulnerabilities and check policy violations. See the demo video for free usage.
Quick Setup
1. Enable CI on Your Project
Create a.gitlab-ci.yml file in the root of your project:
2. Add Vet as a CI Component
Add the following to your.gitlab-ci.yml file:
Viewing Results
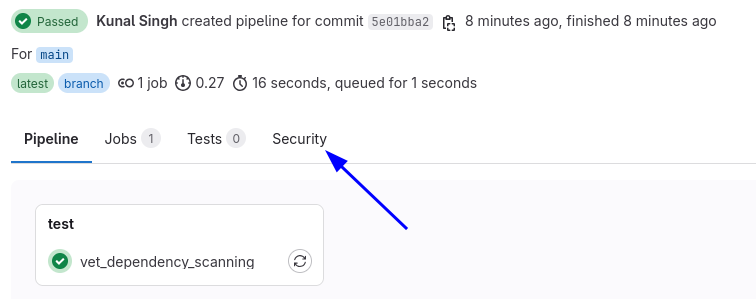
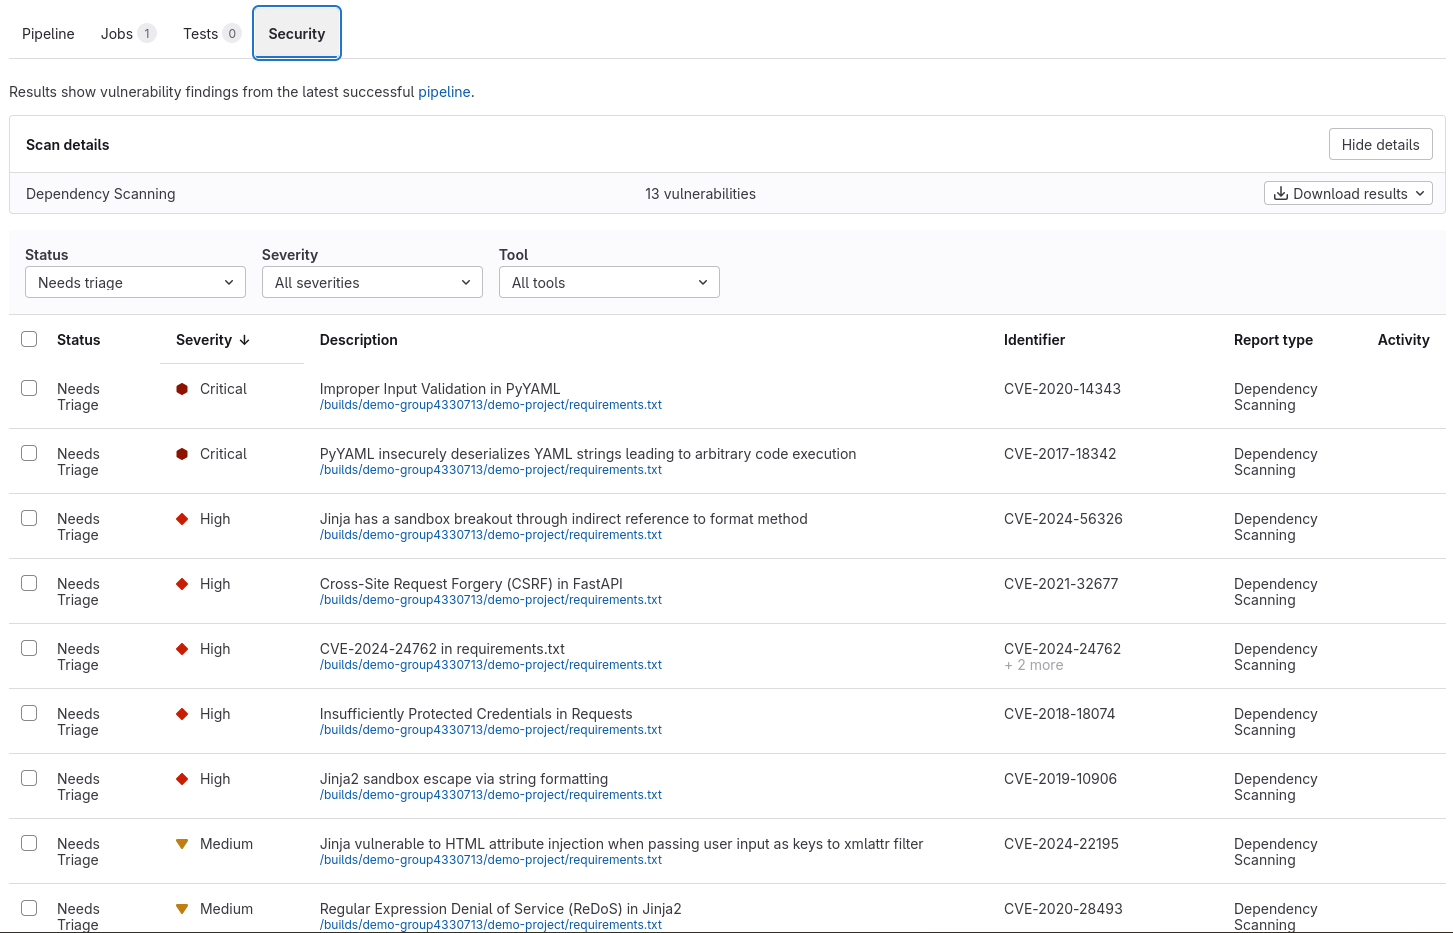
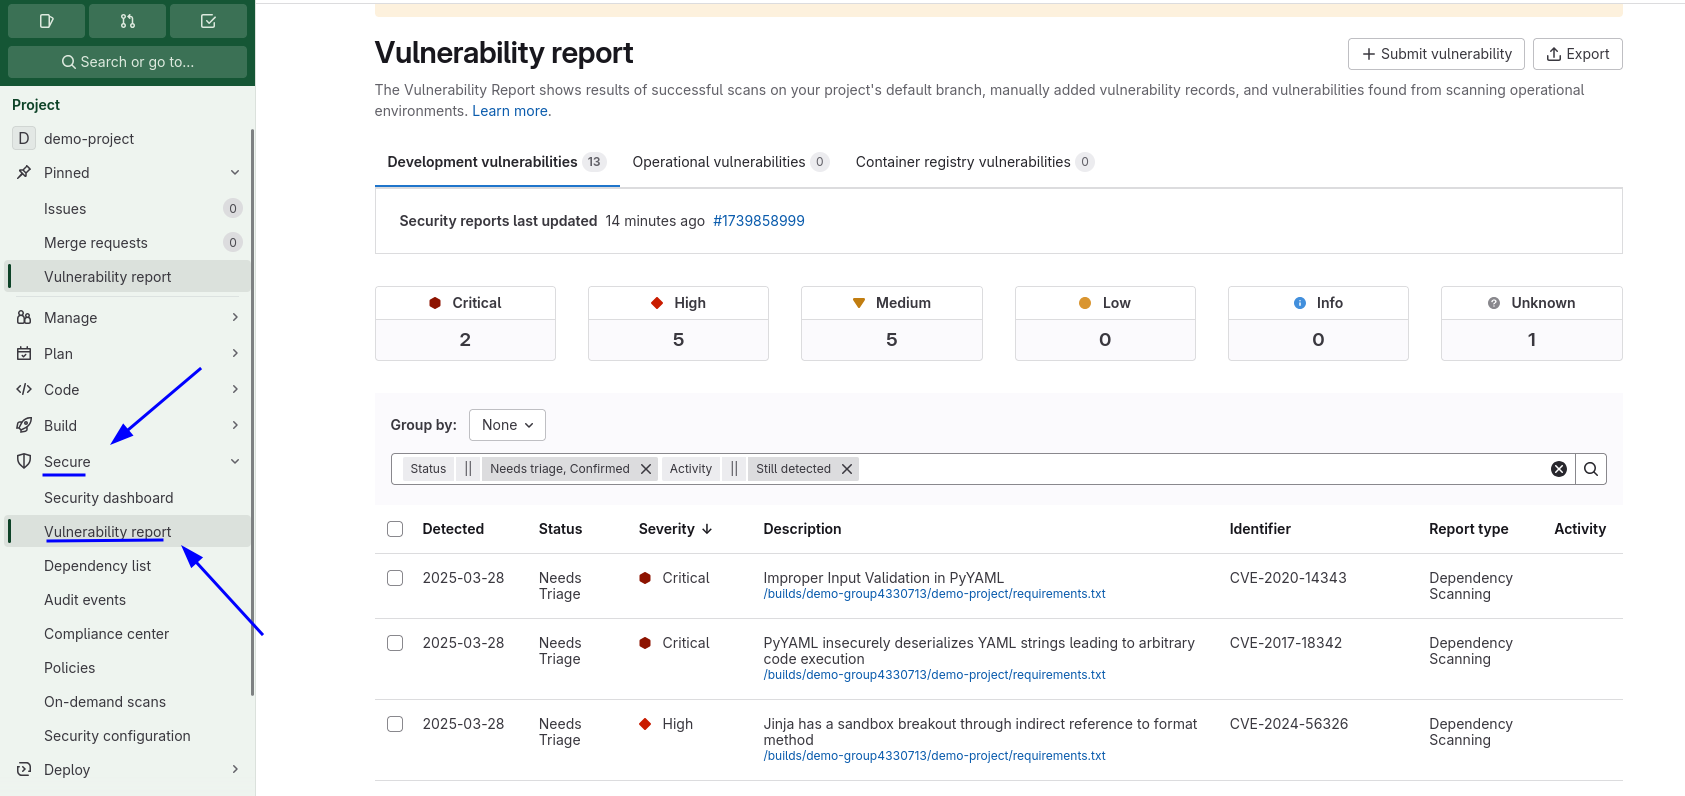
Once configured, thevet job appears in your pipeline with a security tab:
Configuration Options
Cloud Sync Integration
Enable SafeDep Cloud synchronization:Policy Configuration
Use custom policies for advanced filtering:Version Control
Specify which version ofvet to use:
These are two independent versions: the component tag (
@v1.5.1) pins the GitLab CI component, and the version input pins the vet binary the component downloads and runs.Trusted Registries
Configure trusted registry URLs for package verification:Artifact Access
Control who can access scan artifacts:Advanced Examples
Multi-Stage Pipeline
Conditional Scanning
Troubleshooting
Security Tab Not Visible
Security Tab Not Visible
Ensure your GitLab plan includes security scanning features. Ultimate plan is required for the security dashboard.
CI Component Not Found
CI Component Not Found
Verify you’re using the correct component path and version. Check the GitLab Component Catalog for the latest version.
Policy Violations Failing Build
Policy Violations Failing Build
This is expected behavior when violations are found. Review the job logs to see which policies were violated, then fix the issues or adjust your policy configuration.
GitLab Component
View complete configuration options and examples
Report Issues
Report bugs or request improvements